Treat this one like a weekend project, not a Tuesday recipe. A proper batch of baechu kimchi takes the better part of an afternoon, most of it waiting rather than working, and it wants counter space, a big bowl, and a container big enough to hold the finished thing without leaking in your fridge. That’s the honest pitch. If you want kimchi tonight, our easy mak kimchi recipe gets you there in about half an hour with a shortcut version of this same process. This is the one to make when you’ve got a free Saturday and want to understand what kimchi actually is, rather than just buy it.
Baechu-kimchi (배추김치) — napa cabbage kimchi — is the kimchi. When someone says “kimchi” with no qualifier, in Korea or anywhere else, this whole-leaf, deep-red version is almost always what they mean. Every other kimchi on a Korean table, from cubed radish kkakdugi to watery nabak-kimchi, is a variation on the idea this one established.
Quick facts
| Time | About 3 hours of active + waiting time, plus 1–2 days to ferment |
| Makes | One large jar, roughly 2 kg / 4.5 lb finished |
| Difficulty | Medium — no single hard step, but several long ones stacked together |
| Spice level | 3 / 5, adjustable by how much gochugaru you use |
| Vegan? | Yes, with the fish sauce and shrimp swapped — noted below |
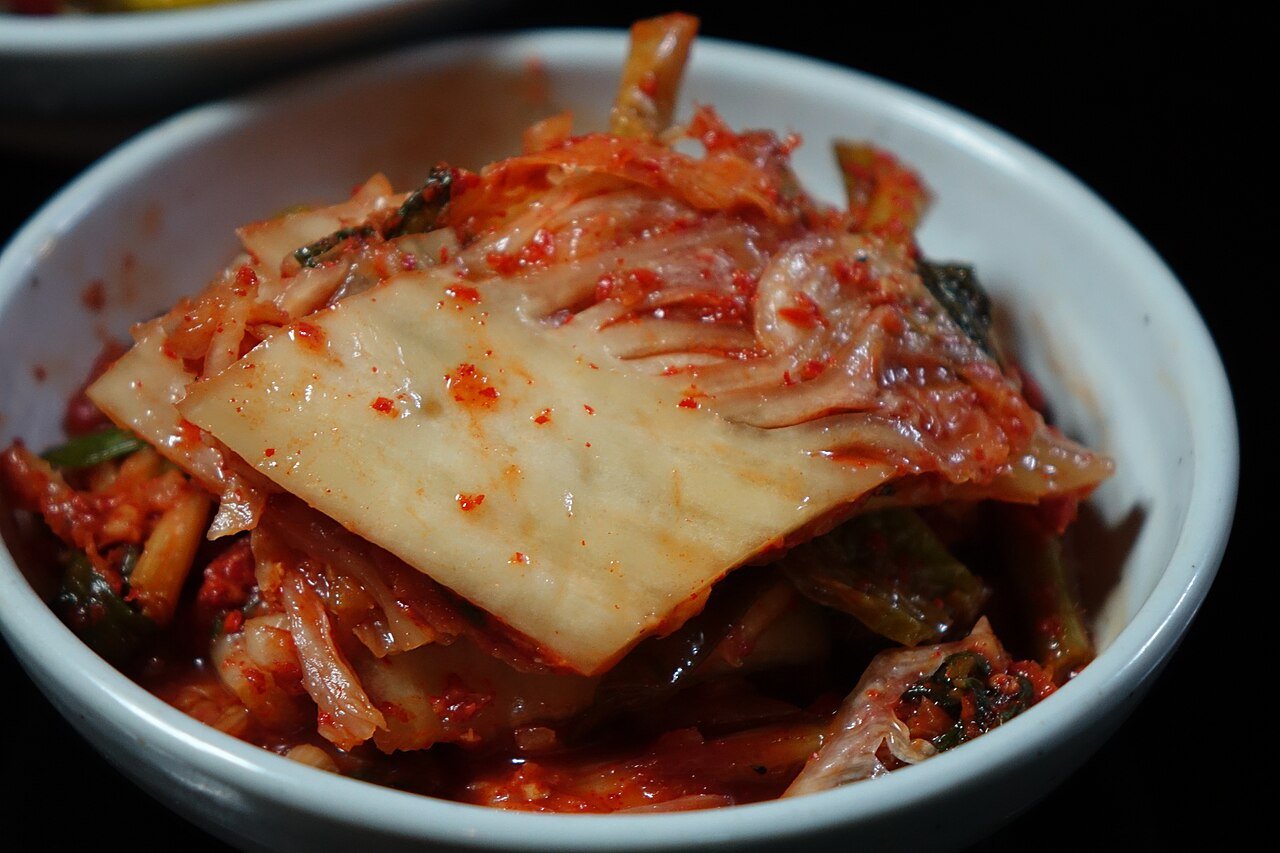
Baechu Kimchi Recipe
Ingredients
Method
- Cut the cabbage into quarters through the core so the leaves stay attached at the base.
- Dissolve half the salt in the water to make a brine. Soak the cabbage quarters in the brine for 1 hour, then lift them out and rub the remaining salt by hand between the thicker white ribs of every leaf.
- Let the salted cabbage sit for 1 to 2 hours more, turning it once, until the thick stem end bends without snapping like a fresh leaf would.
- Rinse each quarter three times in cold water to remove excess salt, then stand it in a colander to drain for at least 30 minutes.
- Whisk the rice flour into the water and simmer 3 to 4 minutes, stirring, until it thickens into a thin, glossy porridge. Cool it before using.
- Stir the cooled porridge together with the gochugaru, fish sauce, salted shrimp, grated pear, onion, garlic, and ginger into a thick, spreadable paste.
- Fold the radish and garlic chives into the paste.
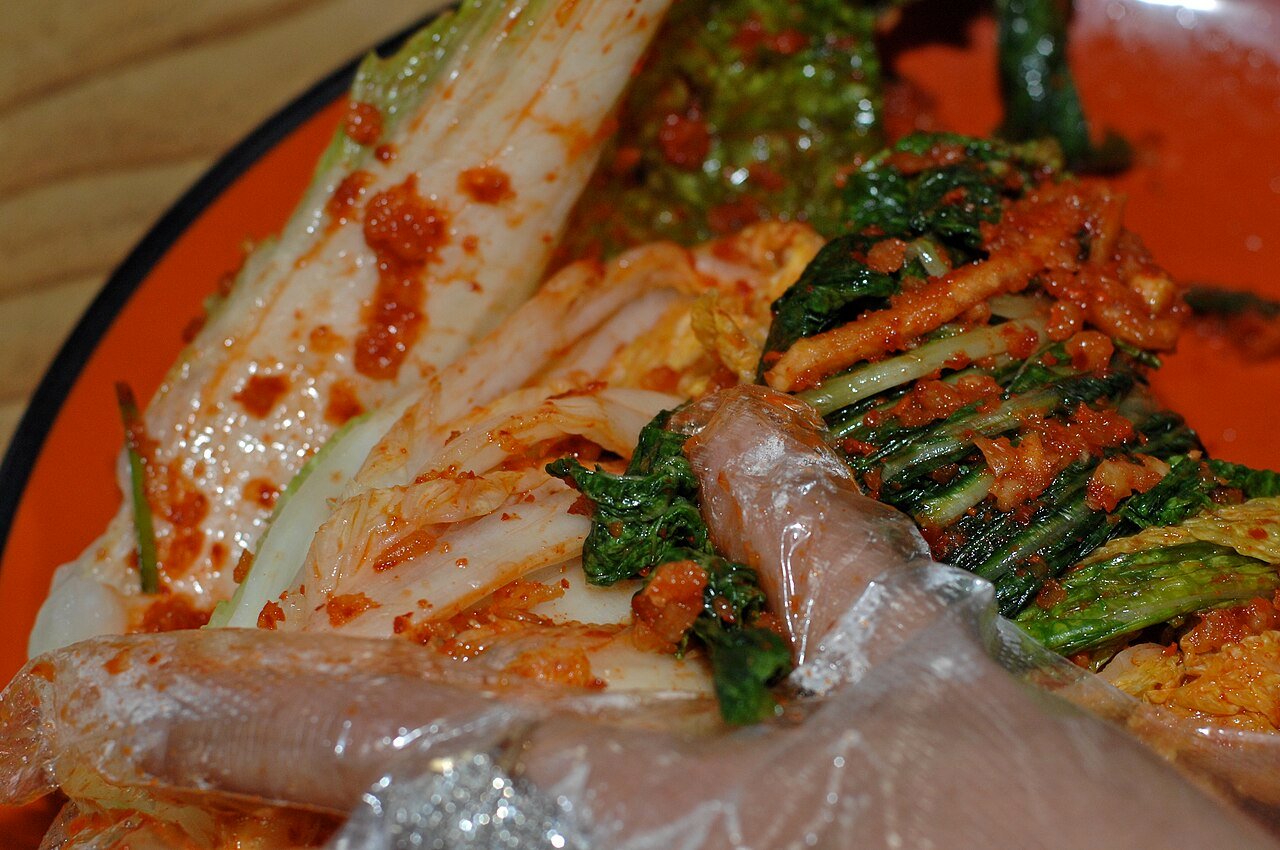
- Wearing gloves, pull each cabbage leaf back gently and spread the paste between every layer, from the core outward, until the whole quarter is coated inside and out.
- Fold each seasoned quarter into a compact bundle and pack it tightly into a clean jar or container, pressing down so no air pockets remain and the kimchi’s own liquid rises above the solids.
- Leave the sealed container at room temperature for 1 to 2 days, until small bubbles appear at the edges, then move it to the refrigerator.
The three stages, and why the order matters
Everything about making kimchi from scratch collapses into three stages, and once you see them as separate jobs rather than one long recipe, the whole process gets much less intimidating.
Salt. The cabbage is quartered, brined, then hand-salted between every leaf, and left to sit until it goes from crisp to pliable. This isn’t seasoning yet — it’s structural. Salt pulls water out of the cabbage by osmosis, which is what lets the seasoning paste cling to the leaves later instead of sliding off, and it’s also the first line of defense against the wrong bacteria taking hold during fermentation. Skip or rush this stage and you get watery, under-seasoned kimchi that never quite ferments right.
Season. A thick, spreadable paste — chili flakes, fish sauce or its substitute, garlic, ginger, a little sweetness from grated pear, and a rice-flour porridge that gives the whole thing body — gets worked between the leaves by hand. This is the messy, satisfying part, and it’s genuinely easier barehanded, gloved for chili burn, than with a spoon. Radish and garlic chives fold in at the end for texture and a fresh, slightly sharp bite against all that savory paste.
Ferment. The seasoned cabbage goes into a sealed container, sits at room temperature for a day or two to kick-start fermentation, then moves to the fridge, where it keeps developing more slowly for weeks. This stage takes no effort at all, which is exactly why it’s the one people underestimate — the difference between a mediocre batch and a great one is almost entirely patience here, not technique back in stage two.
Salting, in more detail
A brine soak followed by a hand-salting between the leaves gets the job done faster and more evenly than either method alone. The brine softens the outer layers quickly; the direct salt, rubbed specifically into the thick white ribs where most of the cabbage’s water is held, reaches the parts the brine works on more slowly. You’ll know it’s ready when a thick stem, bent between your fingers, folds rather than cracks — a fresh cabbage snaps like celery, and a properly salted one gives like a cooked lasagna noodle.
Rinsing after salting matters more than most home cooks expect. Skip it, or rinse just once, and the finished kimchi comes out too salty to eat comfortably, no matter how well the rest of the recipe goes. Three rinses, with a good shake between each, is the number that reliably works.
Seasoning, and the ingredients worth knowing about
Gochugaru is non-negotiable for color and character, and there’s genuinely no substitute that gets both the fruity, sun-dried flavor and the deep red color right at once — paprika gets you red without the flavor, cayenne gets you heat without the color. If you’re building a Korean pantry from nothing, this is one of the first two or three things worth ordering.
Fish sauce and salted shrimp are the two ingredients most likely to be missing from a Western kitchen, and they’re doing slightly different jobs — fish sauce for background savoriness, salted shrimp for little pockets of concentrated brine that pop as you chew. Extra fish sauce alone covers most of that ground. For a fully vegan pot, soy sauce plus a square of kelp simmered into the rice porridge gets you a lighter, cleaner-tasting kimchi that ferments a little differently but is entirely legitimate — vegan kimchi is a real and growing category in Korea too, not just a Western workaround.
A note on kimjang
The tradition this recipe belongs to has a name of its own: kimjang (김장), the late-autumn communal kimchi-making that once saw families and neighbors gather to prepare a winter’s worth of kimchi in a single long day, enough to fill buried clay jars that kept it cold and slowly fermenting through the season. UNESCO added kimjang to its Intangible Cultural Heritage list in 2013, recognizing it less as a recipe than as a piece of social infrastructure — a way communities shared labor and food security before refrigeration existed. Making one jar on your kitchen counter is a much smaller thing, but it’s the same idea in miniature.
Storage and what to expect as it ages
Fresh from the fridge after a day or two at room temperature, this kimchi is mild, crunchy, and only lightly sour — good as a side dish right away. Left in the fridge, it keeps changing: a week in, it’s fuller and tangier; a month in, it’s properly sour and better suited to cooking than eating raw, which is exactly the stage our kimchi jjigae recipe is written around. It keeps safely for months in a sealed container, slowly souring the whole time, and it’s meant to be eaten across that entire arc rather than all at once while it’s young.
Frequently asked questions
How long does homemade kimchi take to ferment?
It’s edible immediately, but recognizably “kimchi” — tangy rather than just salty-sweet — after 3 to 5 days in the fridge, following the initial day or two at room temperature. Real sourness, the kind that’s right for stews, takes several weeks to a couple of months.
Can I make this without a fermentation crock?
Yes. A clean glass jar or food-safe plastic container with a tight lid works fine for a home-sized batch; just leave a little headroom, since the kimchi releases gas and liquid as it ferments and a completely full jar can seep at the lid.
Why did my kimchi turn out too salty or too watery?
Too salty usually means the rinsing step was rushed — three rinses is the number to aim for, not one. Too watery, with the seasoning paste sliding off the leaves, usually means the cabbage wasn’t salted long enough before rinsing; it should bend without snapping before you move on.
If this felt like a lot
It is a lot, honestly, and that’s fine. Our easy mak kimchi recipe uses the same paste and the same fermentation logic on pre-cut cabbage, which salts in a fraction of the time and skips the leaf-by-leaf hand-seasoning here — a real shortcut, not a lesser dish, and the one to reach for on a weeknight. And if this is your first attempt at cooking Korean food at all, the Korean pantry starter kit is worth reading first, since half the ingredients above show up again and again across this site.