Grate a raw potato into a bowl of water and walk away for ten minutes, and something happens that looks a little alarming the first time you see it: the water turns cloudy, then a chalky white layer settles at the bottom like sediment in a river. That’s potato starch, and it’s the entire reason gamja jeon needs no flour, no egg, no batter at all. Scrape that starch back into the drained potato shreds and you’ve built your own binder from a single ingredient.
I didn’t believe this the first time someone told me. It felt like a trick, the kind of shortcut that promises no mess and delivers a soggy mess instead. It isn’t a trick. It’s just patience — ten minutes of doing nothing while a potato does the chemistry for you.
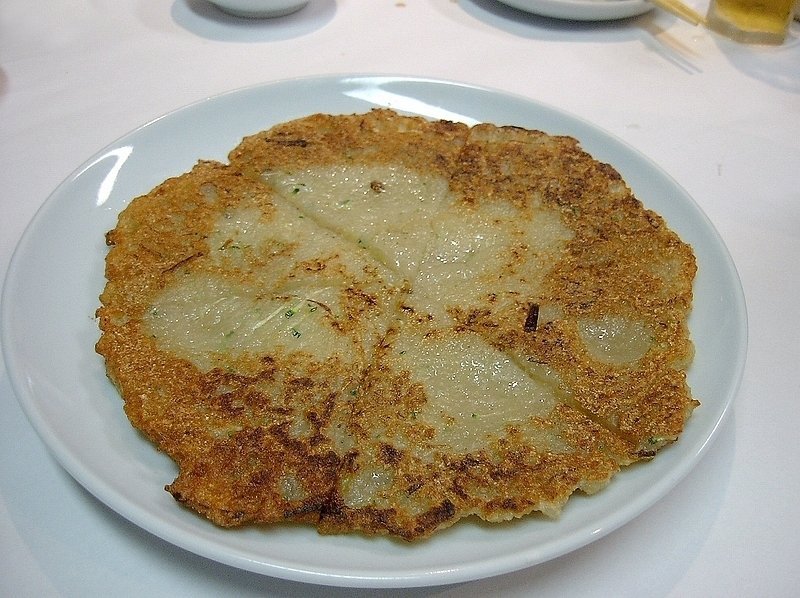
Quick Facts
| Total time | 35 minutes |
| Serves | 2 as a light dish, 4 as a shared plate |
| Difficulty | Easy |
| Heat | 0 out of 5 (all the heat is optional, in the dip or the garnish) |
| Vegan? | Yes, entirely |
What Gamja Jeon Actually Is
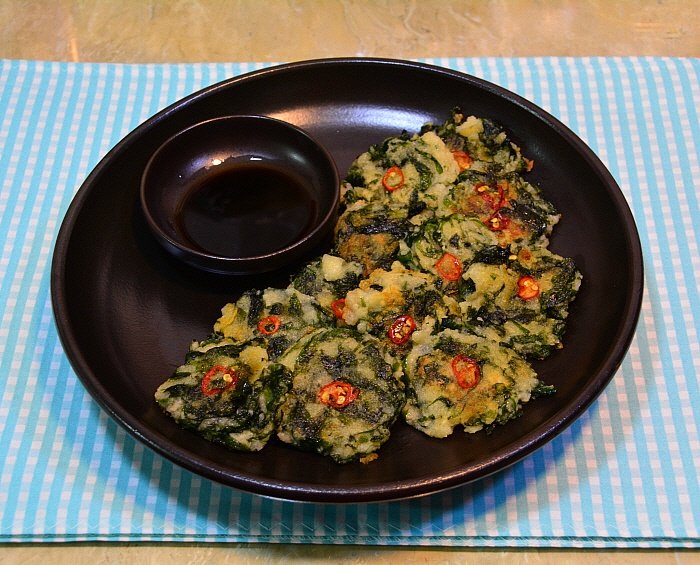
Gamja jeon (감자전) belongs to the same broad jeon family as kimchi jeon and scallion pancakes — batter fried flat in a pan — except the “batter” here is just potato and its own starch, no flour required. It’s a farmhouse dish more than a restaurant one, the kind of food that shows up on a dinner table when there are potatoes in the pantry and not much else needs deciding. Some versions mix in grated onion for a little sweetness, and a coastal variation folds in chopped parae, a fine dried seaweed, giving the pancake a speckled green look and a faint ocean note.
It’s plain food, and that’s the appeal. No fermented ingredients, no chili unless you want it in the dip, nothing that needs explaining to someone eating Korean food for the first time.
The Rice Cake Question, Solved With Water Instead
Here’s the part that actually decides whether gamja jeon holds together or falls apart in the pan, and it has nothing to do with how finely you grate the potato.
Starchy potatoes — russets, the kind sold for baking — release a large amount of starch into the water when grated. Given ten minutes of standing time, that starch settles into a distinct, separable layer at the bottom of the bowl. Pour off the cloudy water above it, and what’s left stuck to the bottom is close to pure potato starch, exactly the kind of thing you’d buy in a bag labeled “potato starch” at the store, except you made it for free from the potato you already had.
Waxy potatoes, like Yukon gold or red potatoes, don’t do this nearly as well. They carry less starch to begin with, so the settled layer is thinner and the finished pancake is more likely to crumble apart when you try to flip it. If waxy potatoes are what you have, add a tablespoon of flour to the mixture as backup insurance — it won’t taste identical to the pure-starch version, but it’ll hold its shape.
Skip the settling step entirely and just squeeze the grated potato dry, and you’ll get a thinner, more delicate pancake that tears more easily in the pan. It still tastes fine. It just needs a gentler hand at the flip.
Ingredients
| Ingredient | Where to get it, or what to use instead |
|---|---|
| Starchy potatoes, 500 g / 1 lb | Russets are ideal — labeled “baking potatoes” in most US grocery stores. Waxy potatoes (Yukon gold, red) work but need 1 tbsp flour added as insurance against falling apart. |
| Onion, 1/2, optional | Regular yellow onion, grated fine. Skip it for a plainer, slightly less sweet pancake. |
| Chili, for garnish | Any fresh green or red chili, thinly sliced. Purely visual and a small kick — entirely optional. |
| Gochugaru, for the dip | Korean coarse chili flakes. A pinch of any chili flake works, or skip the dip’s heat entirely; the pancake itself carries no spice on its own. |
Gamja Jeon Recipe
Ingredients
Method
- Peel the potatoes and grate them coarsely into a large bowl of cold water. The water keeps the shreds from browning while you work.
- Grate the onion, if using, directly into the same bowl.
- Let the mixture sit undisturbed for 10 minutes. The potato starch will sink and settle as a chalky white layer at the bottom of the bowl.
- Carefully pour off the cloudy water on top without disturbing the settled starch, then tip the grated potato into a strainer set over the same bowl and press out as much remaining liquid as you can.
- Pour off the water from the bowl a second time, leaving just the thick white starch paste stuck to the bottom.
- Scrape that settled starch into the drained potato shreds along with the salt, and mix by hand until it binds into a loose, sticky mass. No flour needed.
- Heat 2 tablespoons of oil in a nonstick pan over medium heat until shimmering.
- Spread a portion of the potato mixture into a thin, even round, about 5 mm / 1/4 in thick, pressing it flat with the back of a spoon.
- Cook undisturbed for 5 to 6 minutes, until the underside is deep golden and firm enough to slide a spatula fully under it without tearing.
- Flip and cook the second side 4 to 5 minutes, pressing down once to flatten it evenly against the pan.
- Repeat with the remaining mixture, adding oil to the pan between batches. Serve hot with the dipping sauce.
How to Make It
- Grate the potatoes into cold water, coarse shreds, straight into a large bowl. The water stops browning and starts the starch-settling process at the same time.
- Grate the onion in too, if using, directly into the same bowl.
- Wait ten minutes, undisturbed. This is the step that does the actual work. You’ll see the water go cloudy, then watch a white layer settle at the bottom as the starch drops out of suspension.
- Pour off the cloudy water carefully, keeping the settled starch layer where it is, then strain the potato shreds over the same bowl and press out the remaining liquid by hand.
- Pour off the water a second time, leaving only the thick, paste-like starch stuck to the bottom of the bowl.
- Mix that starch back into the drained potato with the salt, working it by hand until it clumps into a loose, sticky mass. This is your entire binder — no flour, no egg, unless you’re using waxy potatoes and added the backup tablespoon.
- Fry in thin, flat portions, about 5 mm / 1/4 inch thick, in a well-oiled nonstick pan over medium heat, pressing each one flat with a spoon.
- Give it 5 to 6 minutes per side, undisturbed until the underside is deep gold and firm enough to slide a spatula fully underneath without it breaking.
- Flip once, press once, and repeat with the rest of the mixture, adding a little fresh oil to the pan between batches.
Tips and Storage
If your pancake falls apart at the flip, you probably skipped the starch-settling step or used waxy potatoes without the flour backup. Both are fixable next time.
Salt the potato right before frying, not earlier. Salting grated potato too far ahead pulls out extra water and can undo some of the starch work you just did.
Storage: gamja jeon keeps 2 days in the fridge and reheats best in a dry skillet, 2 to 3 minutes a side, to bring the crisp back. It softens in the microwave.
Common Questions
Do I really not need any flour for gamja jeon?
With starchy potatoes like russets, no. The potato releases enough of its own starch during the ten-minute soak to bind the pancake on its own. Waxy potatoes are the exception — add a tablespoon of flour as insurance if that’s what you have.
Why does the water in the bowl turn cloudy?
That’s the potato starch leaching out of the grated shreds and going into suspension. Given time, it settles back out at the bottom of the bowl, which is exactly the starch you scrape back in to bind the pancake.
Can I make gamja jeon ahead of time?
The mixture doesn’t hold well once mixed — the starch starts to separate again if it sits too long, so fry it within 15 to 20 minutes of mixing. Cooked pancakes reheat acceptably in a dry pan, though they’re best straight out of it.
What to Eat With It
Gamja jeon and kimchi jeon run on completely different binding logic even though they land in the same pan — one uses its own starch, the other leans on flour and kimchi brine. If you want something even simpler for a first attempt at Korean cooking, dubu kimchi has almost no failure points at all. And rice flour, gochugaru, and the other staples that show up across these dishes are covered in our Korean pantry starter kit.